Overview
If this is your first time working with 8th Wall, we strongly recommend starting with or referencing an example project.
Loading the Engine
Option 1: Script tag
<script src="https://cdn.jsdelivr.net/npm/@8thwall/engine-binary@1/dist/xr.js" async crossorigin="anonymous" data-preload-chunks="slam"></script>
Option 2: npm
npm install @8thwall/engine-binary
You will need to copy the included artifacts into your dist folder, for example in webpack:
new CopyWebpackPlugin({
  patterns: [
    {
      from: 'node_modules/@8thwall/engine-binary/dist',
      to: 'external/xr',
    }
  ]
})
You can then load the SDK by adding the following to index.html:
<script src="./external/xr/xr.js" async data-preload-chunks="slam"></script>
When importing the package, you will get a simple helper for accessing XR8 once it is loaded. This promise will only resolve if the script tag is included in the HTML.
import {XR8Promise} from '@8thwall/engine-binary'

XR8Promise.then((XR8) => XR8.XrController.configure({}))
Option 3: Full Download
- Download the 8th Wall Engine Binary and unzip it into your project folder
- Add the 8th Wall Engine as a script tag to the
<head>of yourindex.html.
<script async src="./path/to/xr.js" data-preload-chunks="slam"></script>
Preload Chunks
The engine consists of two optional chunks, slam, and face. Depending on the type of experience you want to develop, you can add the data-preload-chunks attribute to the script tag:
- World Tracking & Image Targets:
data-preload-chunks="slam" - Face Effects:
data-preload-chunks="face" - Sky Effects: no
data-preload-chunksrequired
data-preload-chunks="face, slam" is also supported for experiences using both world and face effects.
Alternatively, you can call await XR8.loadChunk() before starting the engine instead of adding the data-preload-chunks attribute to the script tag. For example:
await XR8.loadChunk('slam')
A-Frame
8th Wall can be integrated with your A-Frame project in a few easy steps:
- Include a slightly modified version of A-Frame (referred to as "8-Frame") which fixes some polish concerns in your project. You can find 8-Frame in the
externalfolder of A-Frame example projects, such as https://github.com/8thwall/aframe-world-effects-example/tree/main/external/scripts - Add the
xrconfigcomponent to your<a-scene>. See documentation on xrconfig for more details. - Depending on the type of experience you want to develop, add one of the following components to your
<a-scene>:
- World Tracking & Image Targets:
xrweb. See documentation on xrweb for more details. - Face Effects:
xrface. See documentation on xrface for more details. - Sky Effects:
xrlayers. See documentation on xrlayers for more details.
<a-scene xrconfig xrweb>
See documentation on A-Frame Components, A-Frame Events and A-Frame Event Listeners provided by the 8th Wall Engine.
three.js
To integrate the 8th Wall engine into a three.js project, use the Camera Pipeline Module API to add functionality like drawing the camera feed, creating a three.js scene and enabling world tracking. You should also add a custom camera pipeline module which you use to set up the three.js camera and scene content.
// app.js
const onxrloaded = () => {
  XR8.addCameraPipelineModules([  // Add camera pipeline modules.
    // Existing pipeline modules.
    XR8.GlTextureRenderer.pipelineModule(),      // Draws the camera feed.
    XR8.Threejs.pipelineModule(),                // Creates a ThreeJS AR Scene.
    XR8.XrController.pipelineModule(),           // Enables SLAM tracking.
    window.LandingPage.pipelineModule(),         // Detects unsupported browsers and gives hints.
    XRExtras.FullWindowCanvas.pipelineModule(),  // Modifies the canvas to fill the window.
    XRExtras.Loading.pipelineModule(),           // Manages the loading screen on startup.
    XRExtras.RuntimeError.pipelineModule(),      // Shows an error image on runtime error.
    // Custom pipeline modules.
    initScenePipelineModule(),  // Sets up the threejs camera and scene content.
  ])

  // Add a canvas to the document for our xr scene.
  document.body.insertAdjacentHTML('beforeend', camerafeedHtml)
  const canvas = document.getElementById('camerafeed')

  // Open the camera and start running the camera run loop.
  XR8.run({canvas, allowedDevices: XR8.XrConfig.device().ANY})
}

window.XR8 ? onxrloaded() : window.addEventListener('xrloaded', onxrloaded)
See documentation on the Camera Pipeline Module API and core Camera Pipeline Modules provided by the 8th Wall Engine, including GlTextureRenderer, Threejs, and XrController.
Testing
Test on Desktop
- If node/npm are not installed, install using https://github.com/nvm-sh/nvm or https://nodejs.org/en/download
cdto the project root and runnpm install.

- Run
npm run serveto run the development server. Once the local server is running, you will see the URL/IP addresses your project is running at.
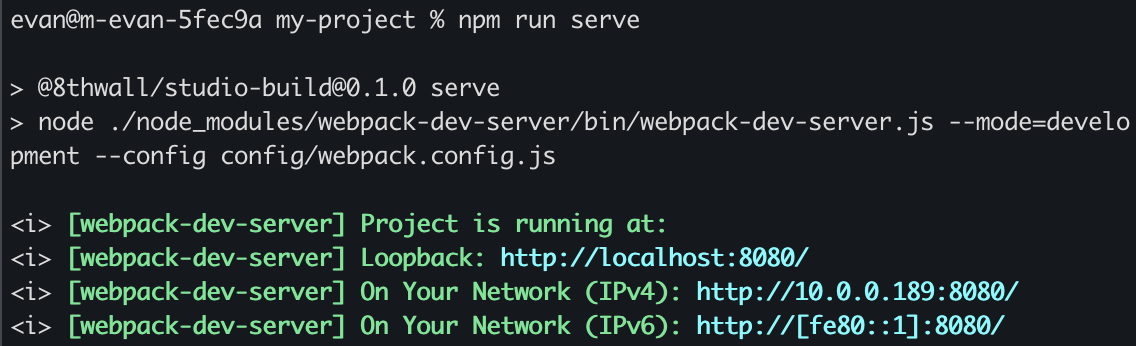
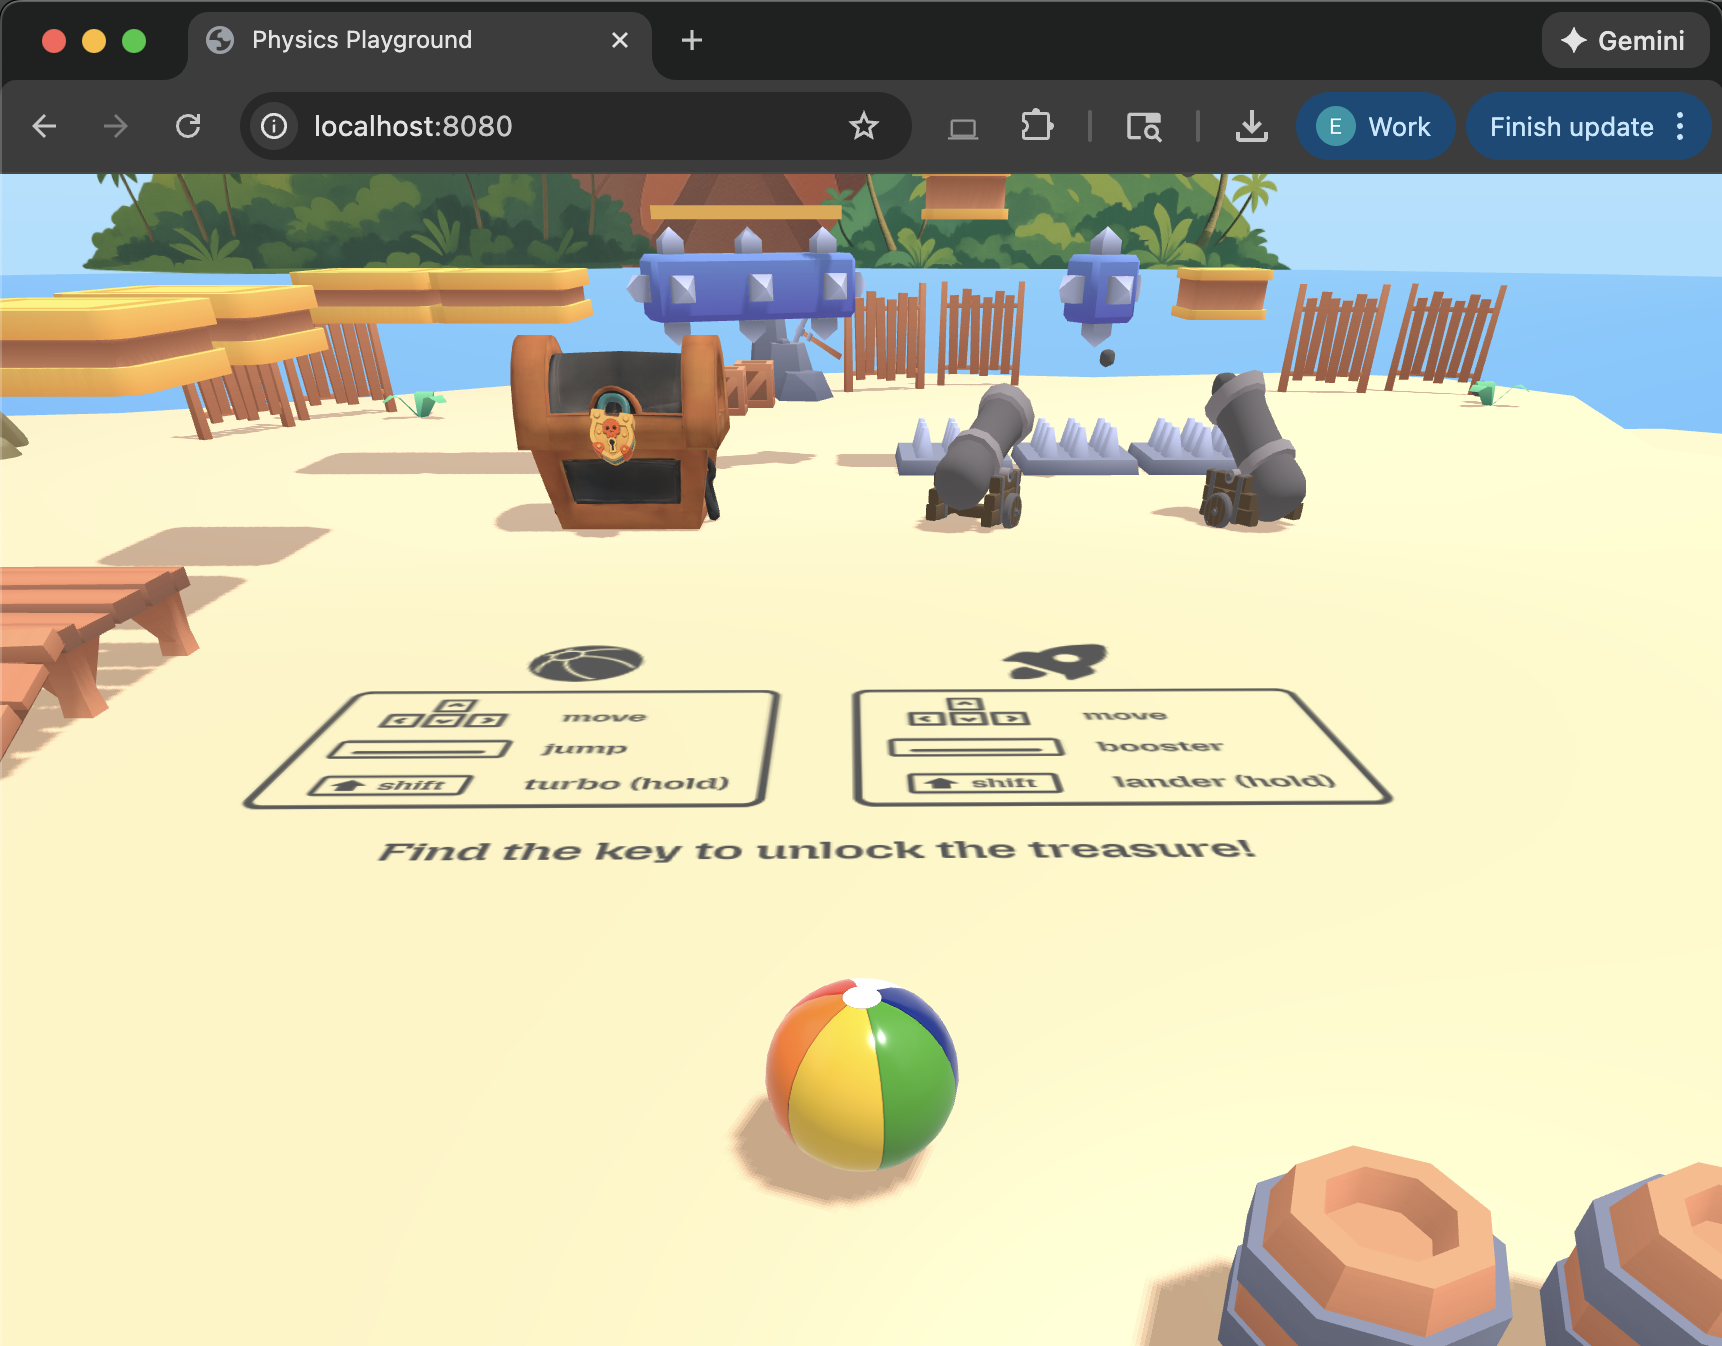
- Open a new browser window and paste in the loopback URL or IP address to test your project in development mode.
Test on Mobile
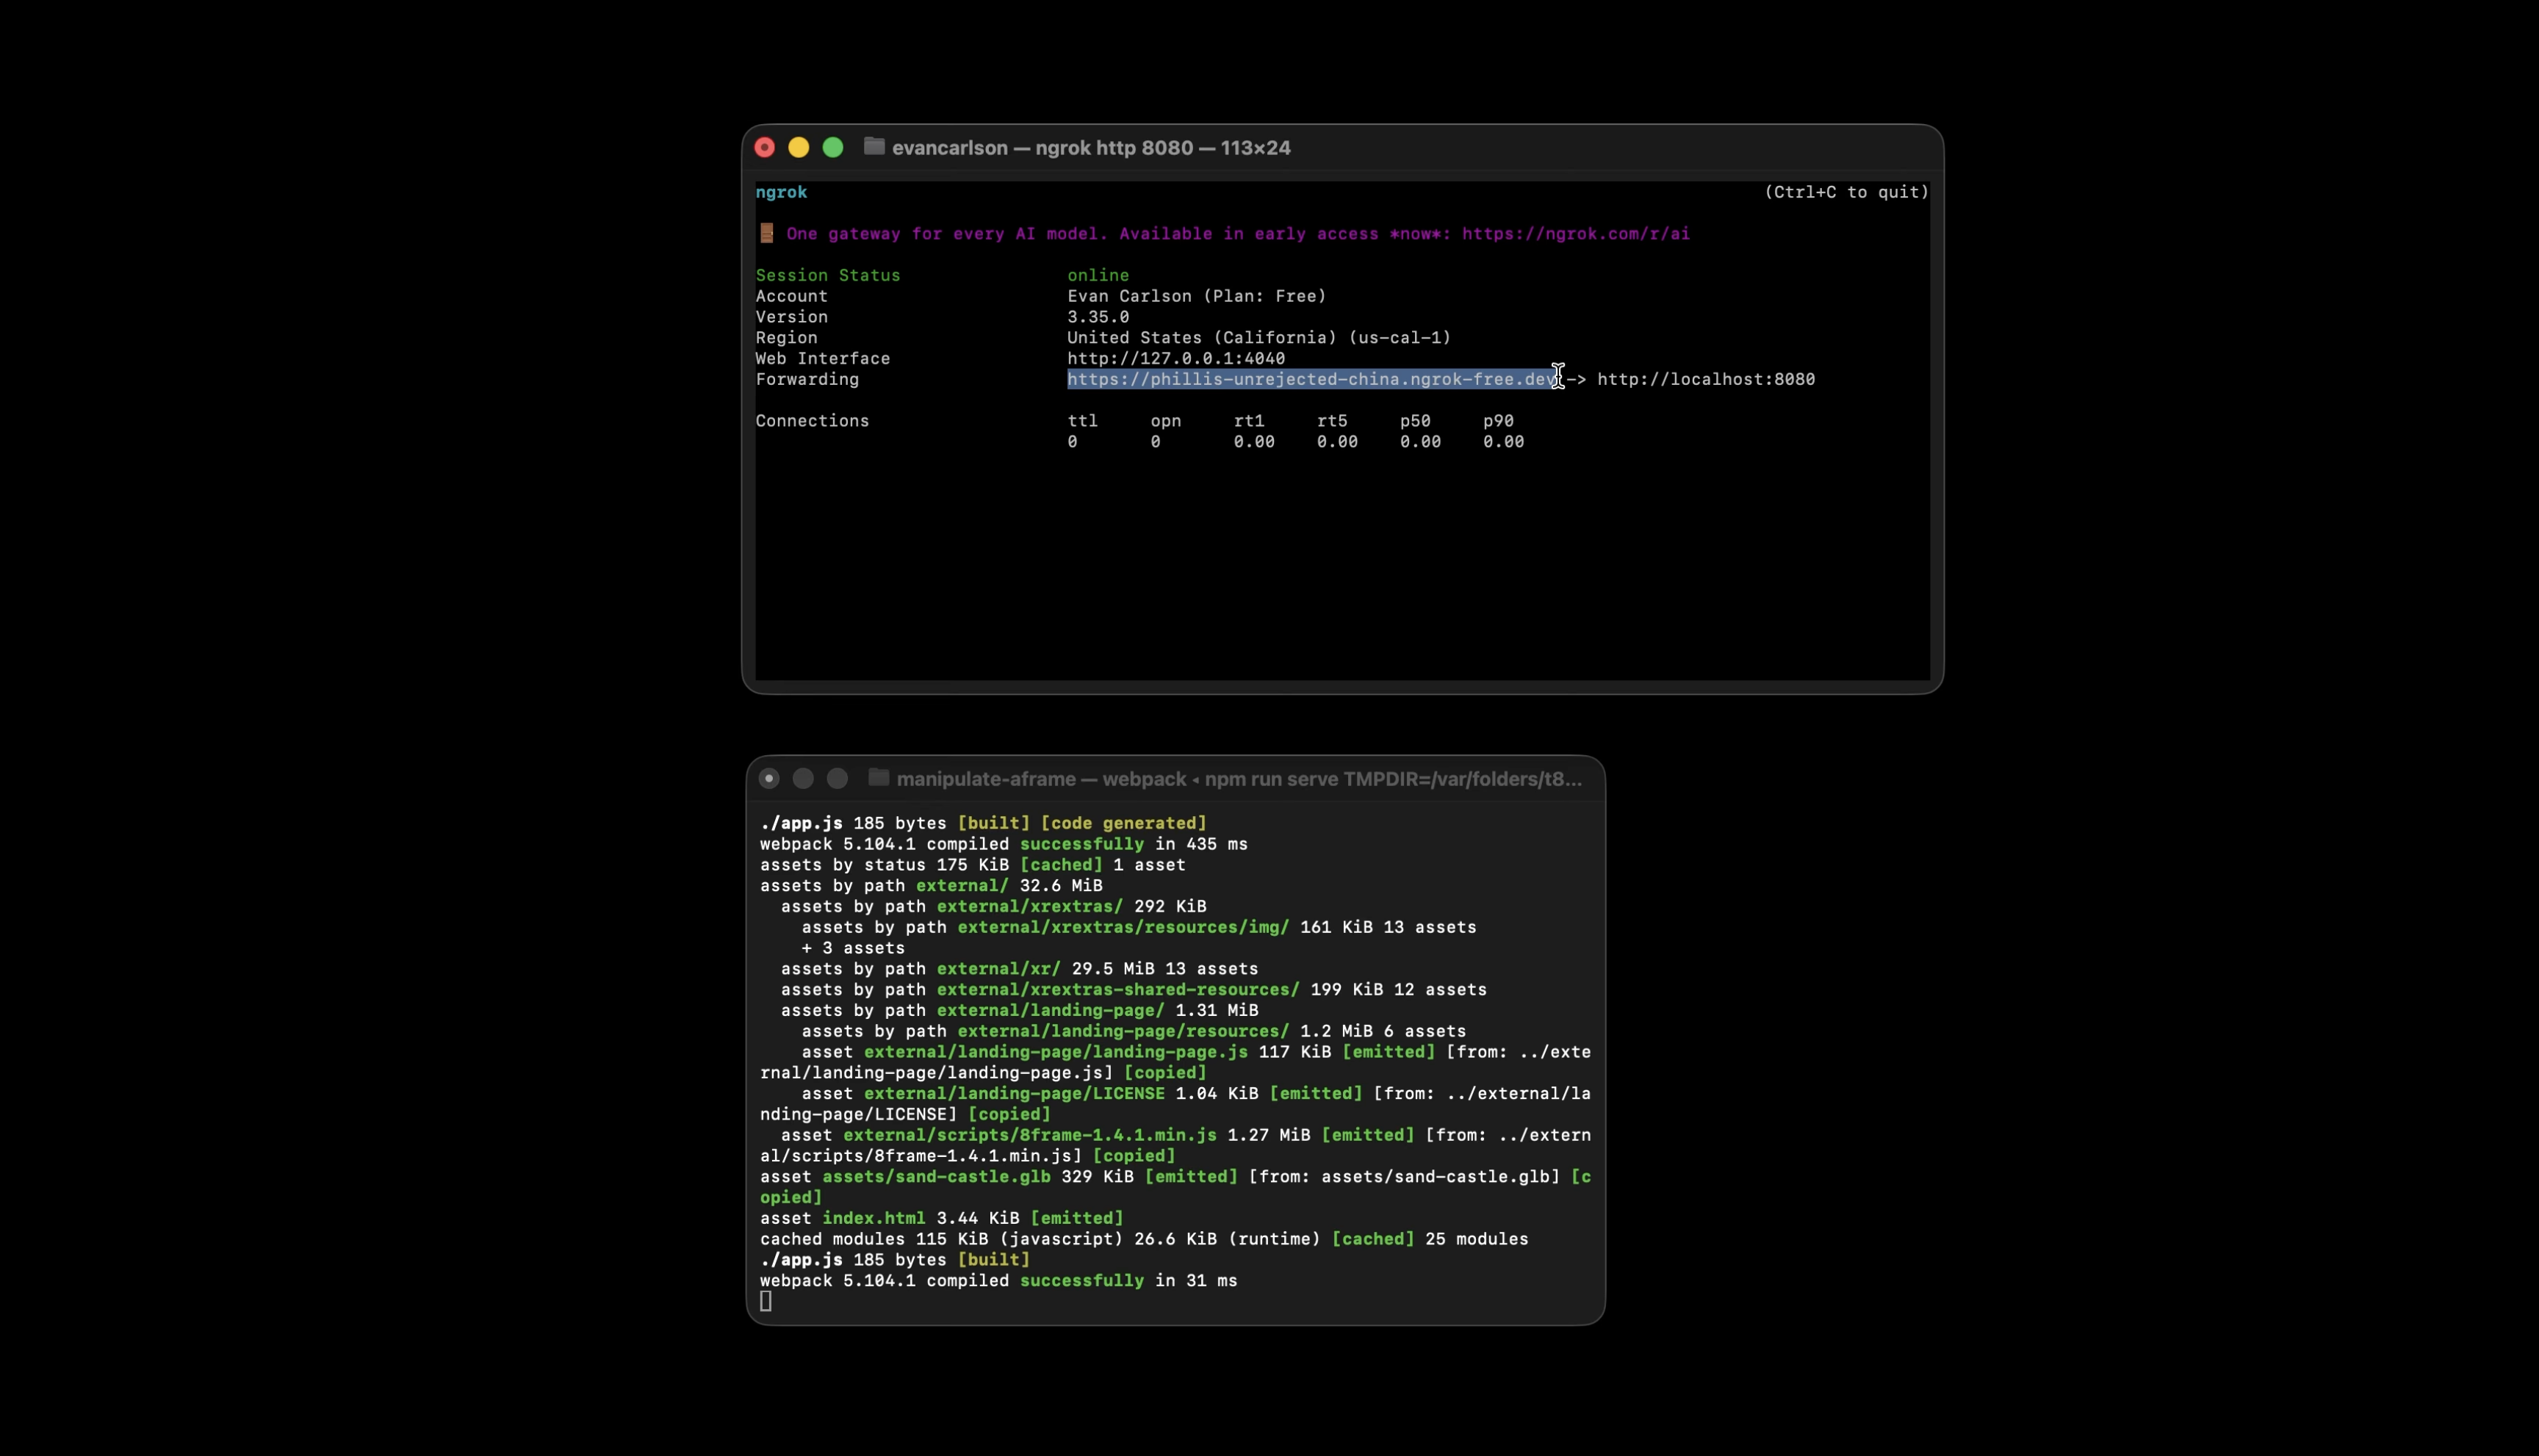
To test your project on mobile devices, especially for AR experiences that require camera access, you'll need to serve your development server over HTTPS. We recommend using ngrok to create a secure tunnel to your local server.
- Go to ngrok.com and create an account. Once signed in, follow the steps on the dashboard to install ngrok.
- Update (or verify) your project configuration. In the
configfolder, openwebpack.config.jsand look for thedevServerobject. Add (or verify) ngrok as anallowedHost:
devServer: {
  // ... existing config
  allowedHosts: ['.ngrok-free.dev']
}
cdto the project root and runnpm install. Runnpm run serveto run the local development server.- Open a seperate terminal window and run the following command (in most cases,
[port]will be8080)
ngrok http [port]
In the output you should see an ngrok URL that uses HTTPS and forwards to your local development server. You can paste this into your browser window and test your project on a mobile device.