Image Targets
Use the image target example project as a reference to get started and confirm your project structure is set up correctly.
Introduction
Image Targets allow you to set a flat, cylindrical or conical shape as a trigger or marker to overlay AR content.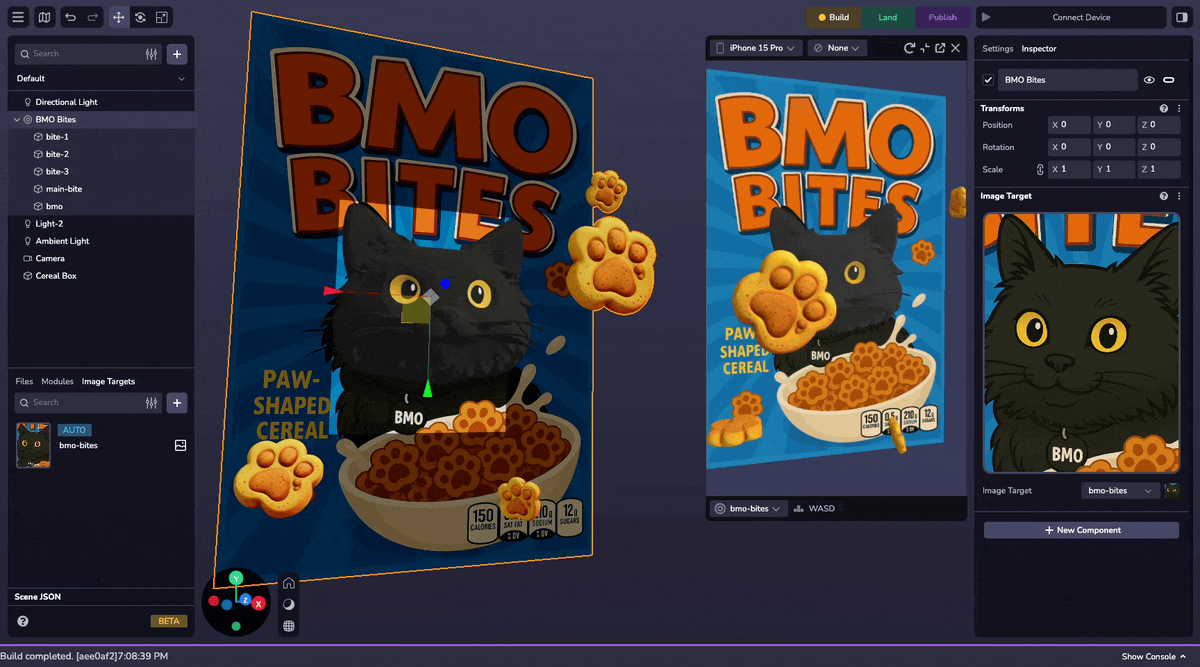
Enabling Image Targets
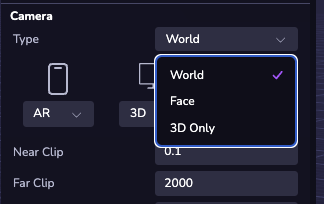
To enable image targets in your project, you must use a World camera.
- Select the Camera in your scene
- Set the Type to
World
If you do not plan to use World Tracking in your project, you can use the Disable World Tracking setting to improve performance.
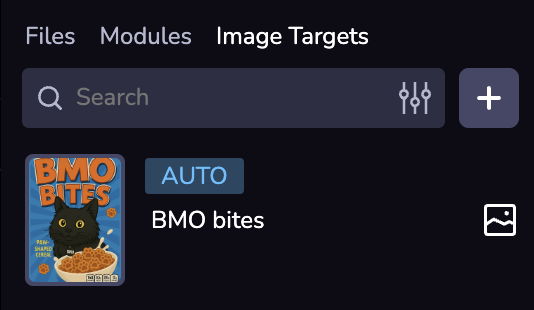
Adding Image Targets
Upload the Image Target
Locate the Image Targets panel at the bottom left of the Studio Interface. Click on the ( + ) to add a flat, cylindrical, or conical image target.
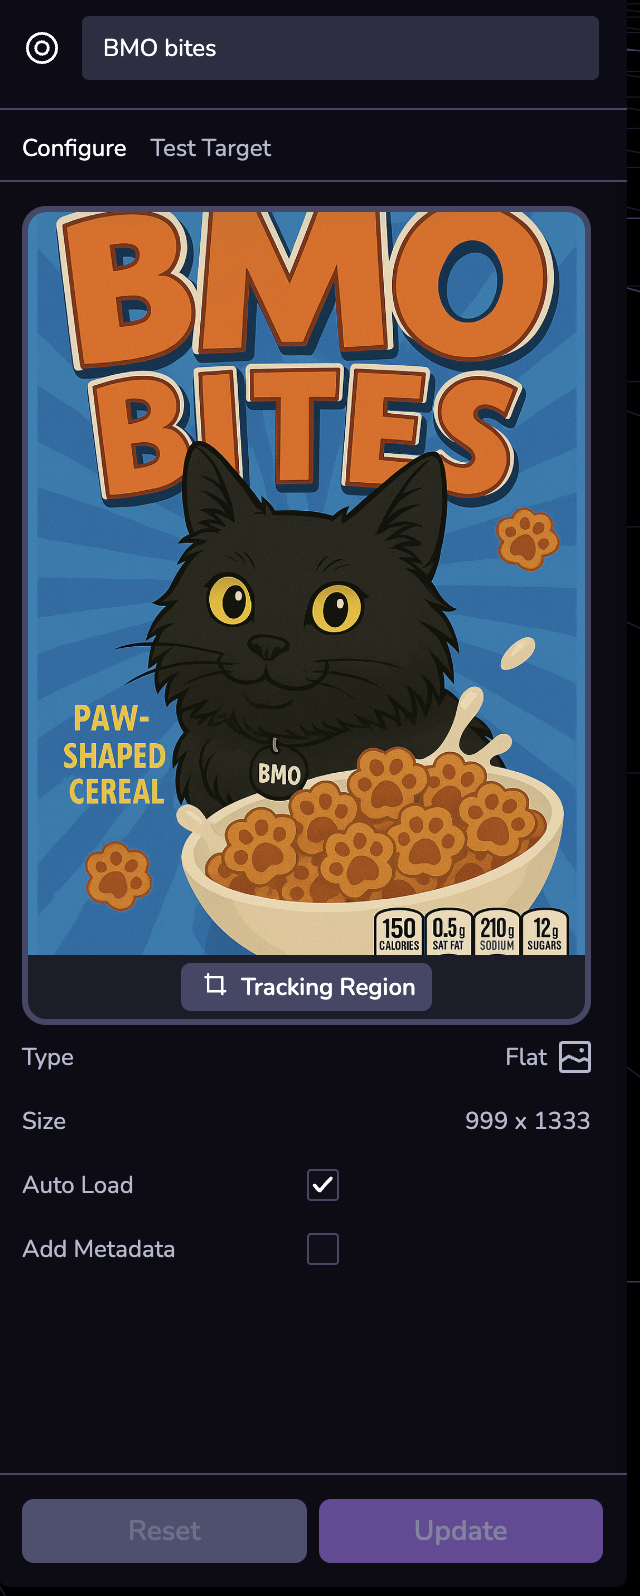
Configuring the Image Target
Customize the image target's tracking region and metadata.
Configuring Image Targets
Create a file named app.js in the src folder (if you don't have one already). At the top of the file, configure image targets by providing paths to each image target's metadata JSON file.
const onxrloaded = () => {
  XR8.XrController.configure({
    imageTargetData: [
      require('../image-targets/target1.json'),
      require('../image-targets/target2.json')
    ],
  })
}
window.XR8 ? onxrloaded() : window.addEventListener('xrloaded', onxrloaded)
Adding the Image Target Entity
To add an image target to your scene:
- Click ( + ) in the Scene Hierarchy and select Image Target.
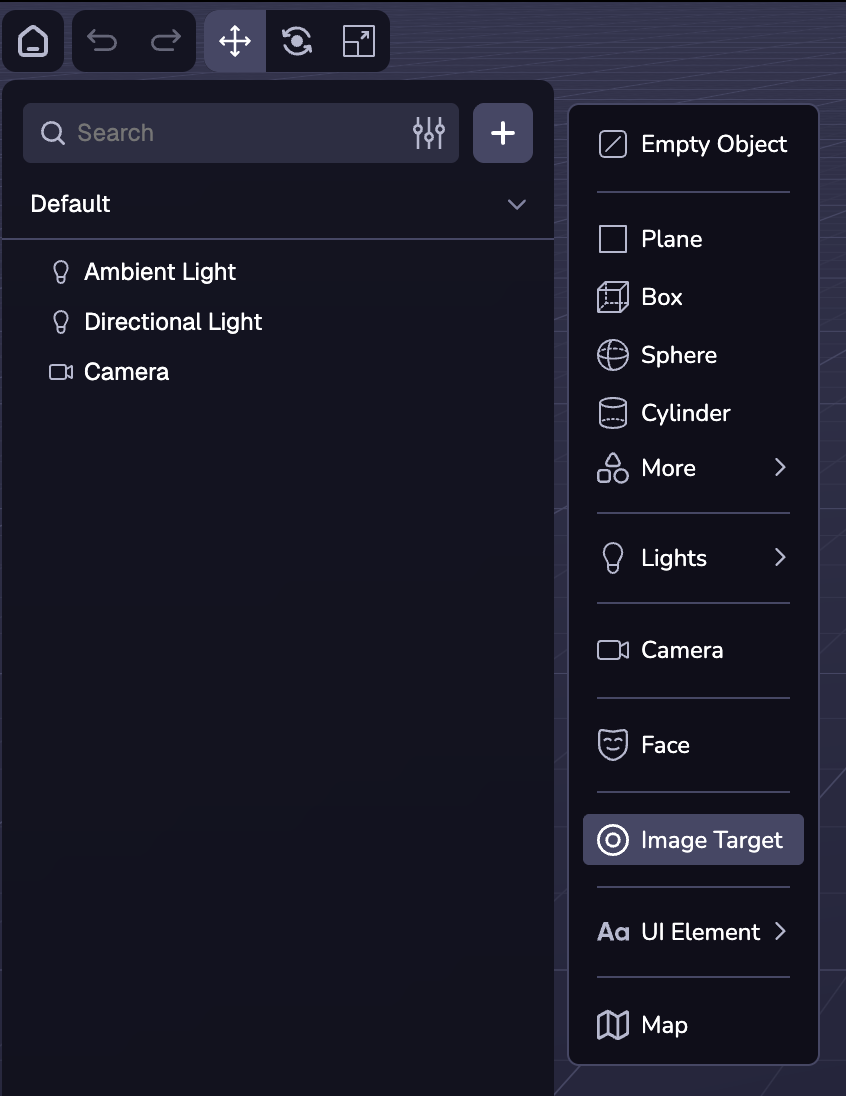
- In the "Image Target" dropdown, select the image target resource you'd like to track.

Using Image Targets
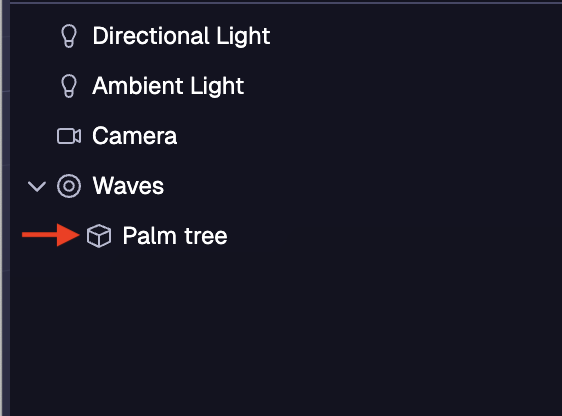
When you add an image target to your project, an image target mesh will appear so that you can align and position other 3D content against the image target.
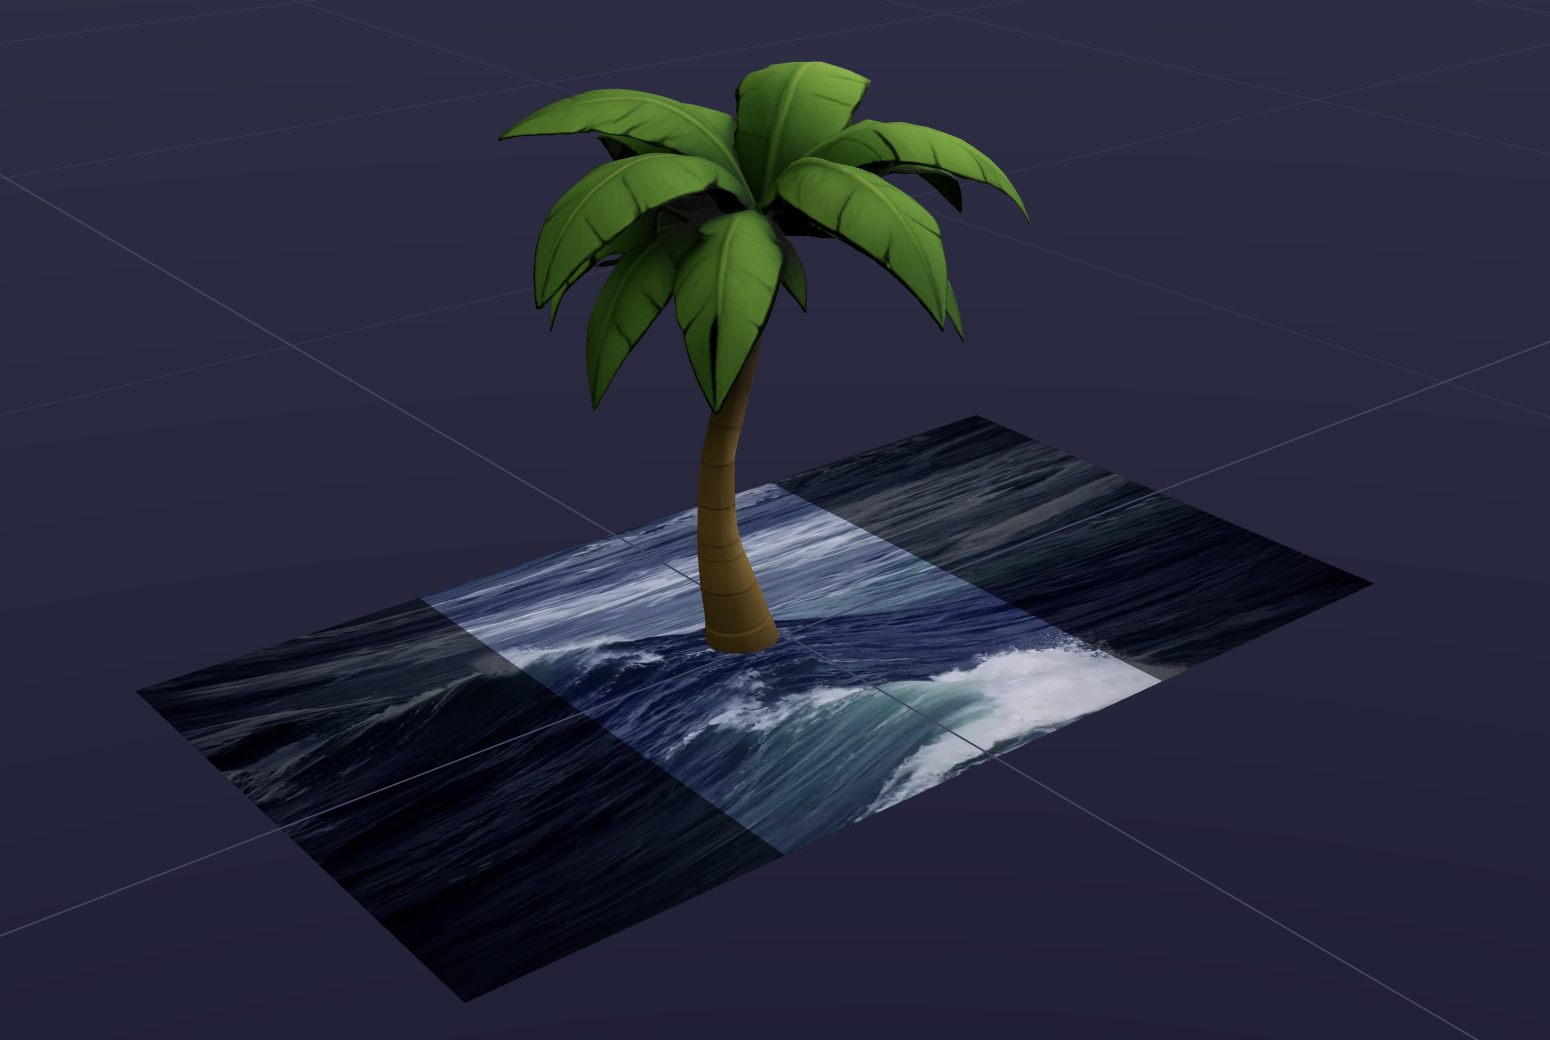
Ensure any entities you want to track to the image target are children of the image target entity.
Optimizing Tracking
Please reference this guide for details on how to improve tracking accuracy.